Course Tour at Crumpin-Fox Golf
Tee | Rating | Slope | Total Yardage |
|---|---|---|---|
Black | 74.1 | 136 | 6,912 |
Blue | 72.6 | 131 | 6,512 |
White | 70.7 | 124 | 6,109 |
Gold (W) | 73.9 | 139 | 5,657 |
Gold (M) | 68.5 | 119 | 5,657 |
Red | 71.1 | 132 | 5164 |
Alt Red | 70.5 | 126 | 5,002 |
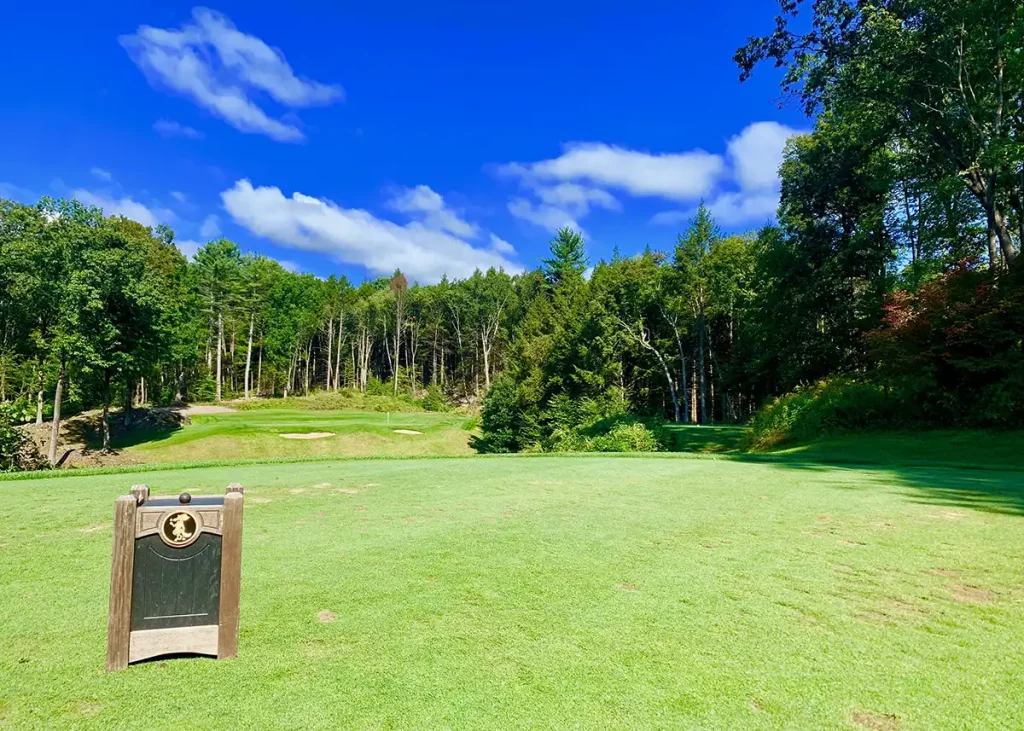
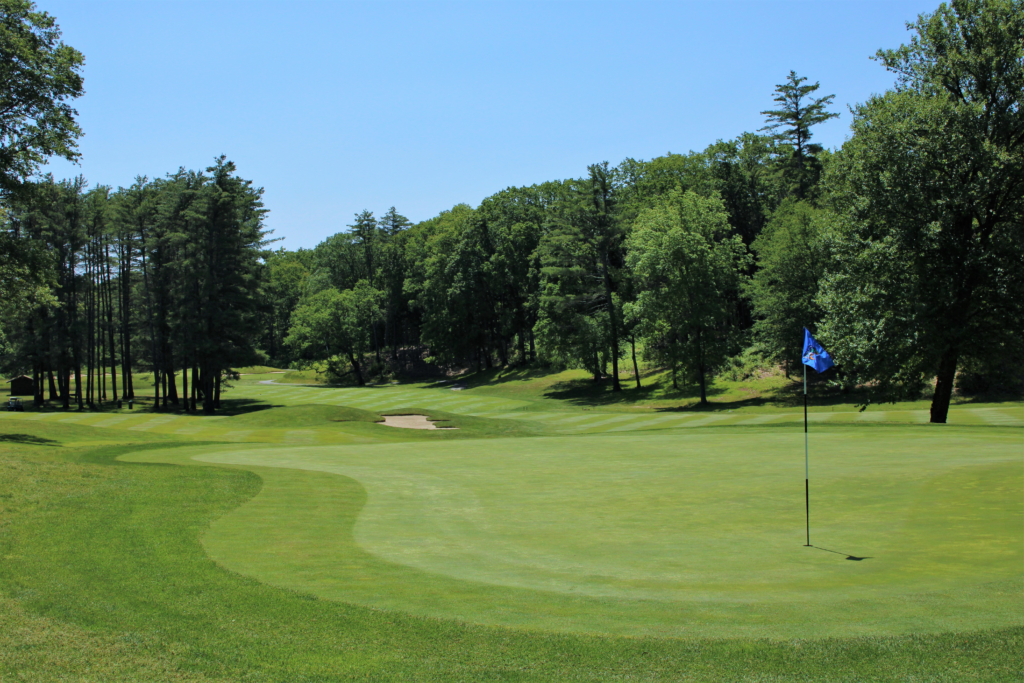
Hole 1
Par 4 | Handicap 5
“It is easy to enter Avernus,” begins Dante’s Inferno, and so might the description of number one at Crumpin- Fox begin.
Truly the first of eighteen great finishing holes, the green is invisible from the tee on this sharp dogleg right. The lone pine on the mound to the right beckons the ambitious player.
The prudent player assays a route down the center of the fairway leaving an uncontested mid- iron shot to an elevated green flanked by two cavernous bunkers.
Tee | Distance |
|---|---|
Black | 414 |
Blue | 386 |
Gold | 363 |
Red | 323 |
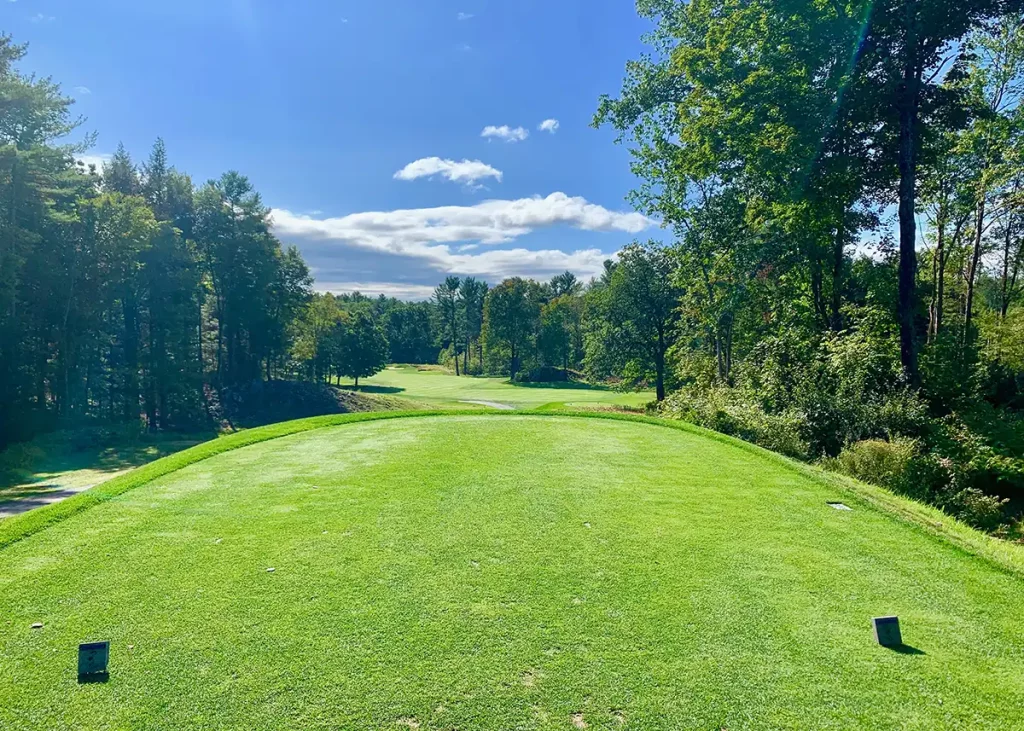
Hole 2
Par 4 | Handicap 13
As the soaring eagle looks down on all it surveys, so does the elevated green of number two, affording a breathtaking panorama of the wide ascending fairway. A judicious tee ball is struck to the right center of the fairway, leaving a relatively level stance for the short approach shot. The long, narrow green is faced with one daunting bunker running its full length. A natural amphitheater is created by the sloping hillside guarding the left side of the green, offering the prospect of projecting mishit shots to the putting surface or clutching them to its unrelenting bosom.
Tee | Distance |
|---|---|
Black | 362 |
Blue | 338 |
Gold | 323 |
Green | 290 |
Red | 290 |
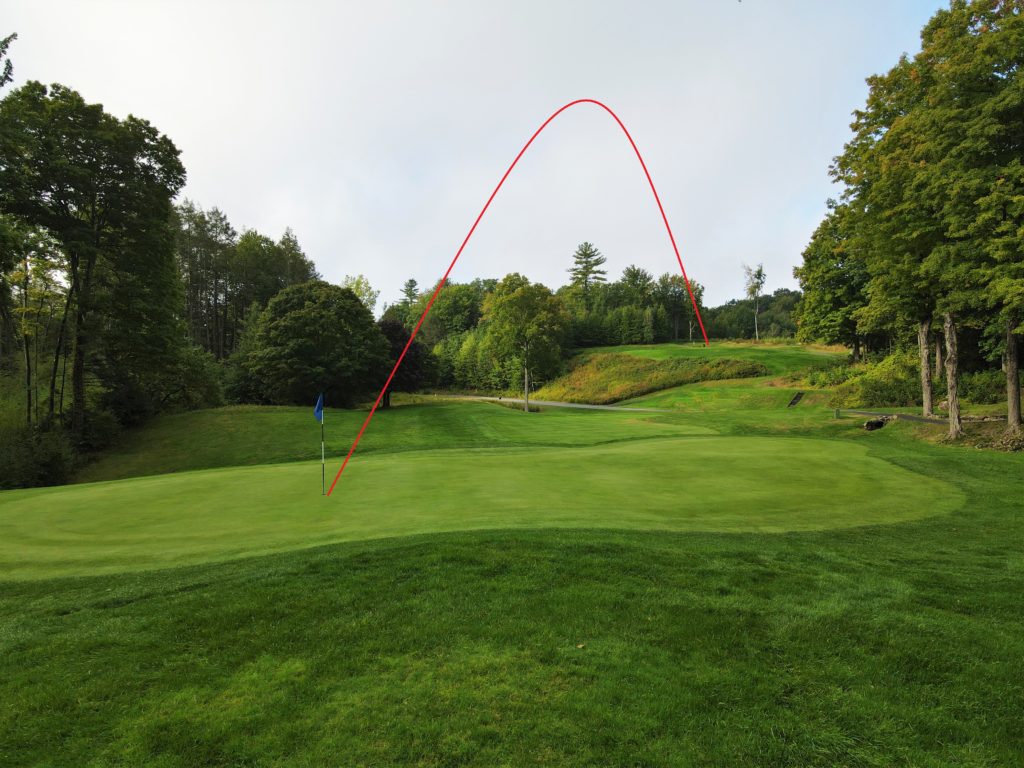
Hole 3
Par 3 | Handicap 17
The swirling winds of Huckle Hill make this long downhill par three a contradiction to all who attempt to select the proper club. Facing the golfer in the shape of a child’s bicycle seat, the green is flanked by two severe bunkers at entry point. The dual tiered green terminates in an unruly sloping hillside falling away from the green’s end. Only a foolhardy golfer hurriedly selects his club, since assuredly to overplay the putting surface is to fly in the face of destruction.
Tee | Distance |
|---|---|
Black | 193 |
Blue | 165 |
Gold | 146 |
Green | 133 |
Red | 133 |
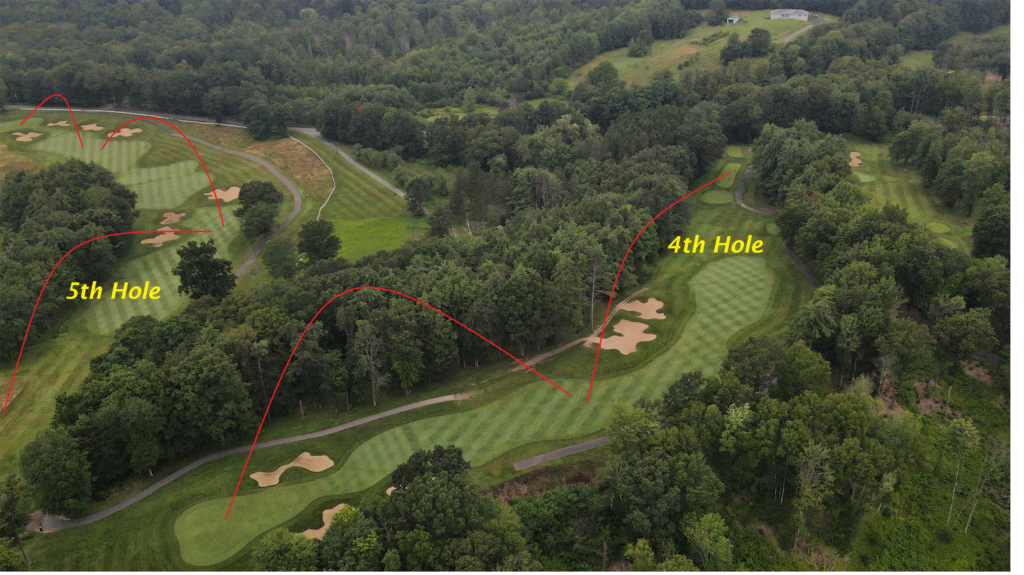
Hole 4
Par 4 | Handicap 11
One looks uphill to the saddle- shaped landing area of this modest par four, with hillside to the left and deep bunkers to the right, and a bit of Prestwick can be inferred. Like Prestwick, the penalties which are not visible are severe indeed. An overly strong tee shot to the left will run through the fairway, down a slope, into a heavily wooded area. The proper tee shot comes to rest in the center of the saddle, and gives a clear view of the green with its vortex contours. An errant approach leaves the golfer with a myriad of plays, none of them desirable.
Tee | Distance |
|---|---|
Black | 392 |
Blue | 345 |
Gold | 315 |
Green | 263 |
Red | 263 |
Hole 5
Par 5 | Handicap 7
The serpentine view of this rustic golf hole flows downward toward spectacle bunkers framing the left-hand side of the landing area. The fairway doglegs upward in a gentle fashion towards the rolling swales in front of the elevated green, replete, as it were, with bunkers. The tee ball must be accurate to avoid the spectacle bunkers left and the brook and OB right. The second shot appears wide open. However, a firm, spinning pitch will only be possible from the fairway. Surely a par here is a good, though not noble score.
Tee | Distance |
|---|---|
Black | 528 |
Blue | 501 |
Gold | 481 |
Green | 424 |
Red | 424 |
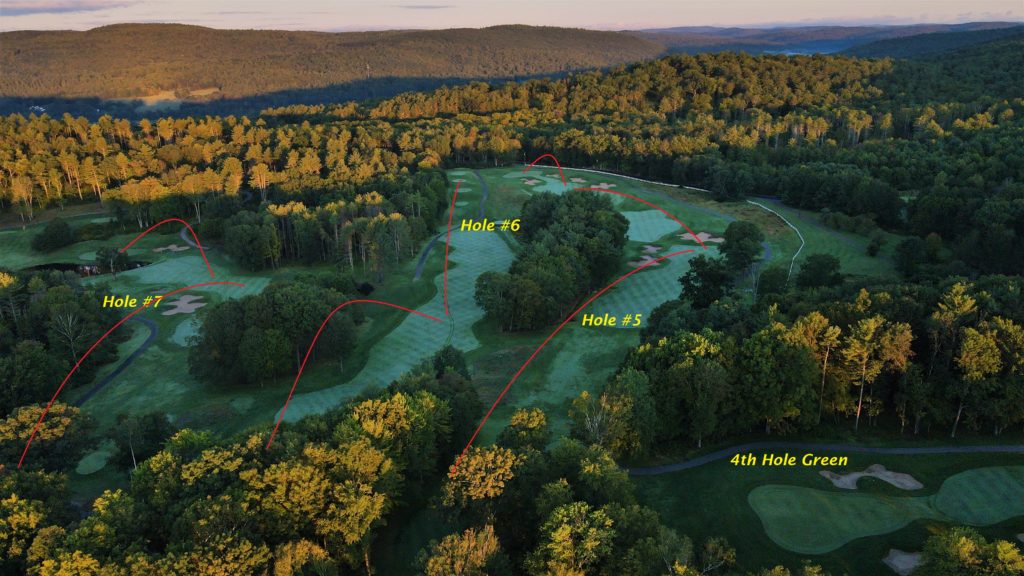
Hole 6
Par 4 | Handicap 3
Whatever may be gained at the fifth can quickly be lost on this mighty par four. A powerful drive struck to the right center of the long descending fairway leaves a relatively straight, uphill shot with a mid to long iron toward the left bunkered, wood armored green. An errant tee shot requires that the golfer play his second shot short of the green and toward the right slope. A birdie here reflects the mettle of the man, as well as his skill.
Tee | Distance |
|---|---|
Black | 448 |
Blue | 402 |
Gold | 379 |
Green | 350 |
Red | 350 |
Hole 7
Par 4 | Handicap 9
Nowhere, save perhaps for the twelfth hole, is there a more lyrical par four. The tee ball must be struck just past the end of the phalanx of bunkers protecting the left corner of the fairway, where it breaks sharply to the watery grave protecting the putting surface. The strong player may opt (at some peril) to play over the bunkers, but with little recompense. The second shot must avoid the bunker right, a hillside beyond, and water in front of the green which, when fairly reached, reveals little of itself to the reader.
Tee | Distance |
|---|---|
Black | 387 |
Blue | 353 |
Gold | 325 |
Green | 308 |
Red | 308 |


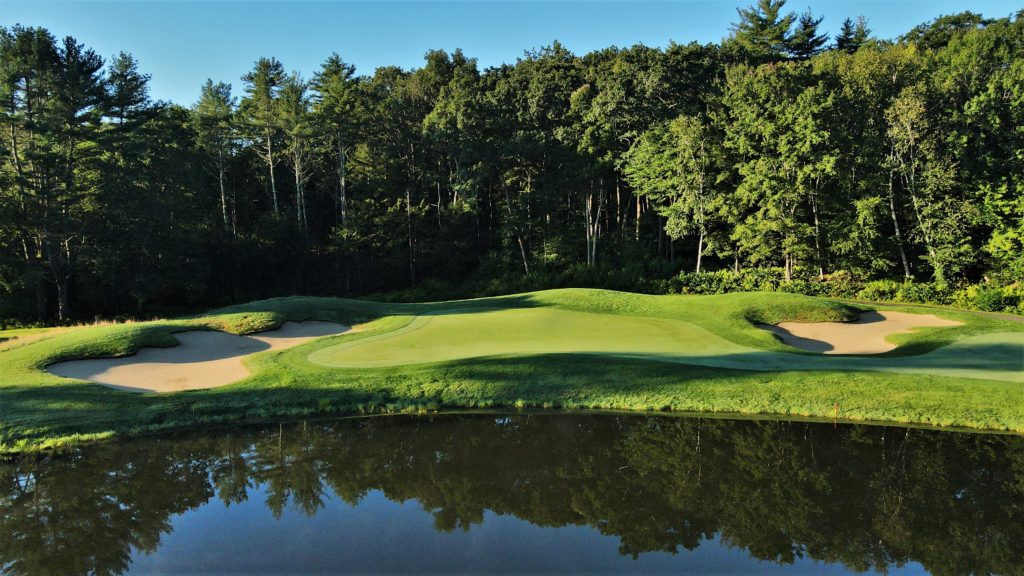
Hole 8
Par 5 | Handicap 1
Many a golfer’s ashes will be scattered over this hole, but well before they had intended to leave this vale of toil and sin. From the elevated tee the golfer may stand awestruck as he contemplates negotiating the enormous expanse of fairway flanked the entire distance on the left by the lake. After finding the fairway with the tee shot, the golfer has the option of laying up short, leaving a mid to long iron to the green, or playing a heroic second shot longer and into a narrowing fairway, leaving a short iron to the green. Thence a fiendish shot over a lake to a green offering a variety of challenging pin locations. Discretion here is the better part of valor.
Tee | Distance |
|---|---|
Black | 592 |
Blue | 568 |
Gold | 528 |
Green | 472 |
Red | 472 |
Hole 9
Par 3 | Handicap 15
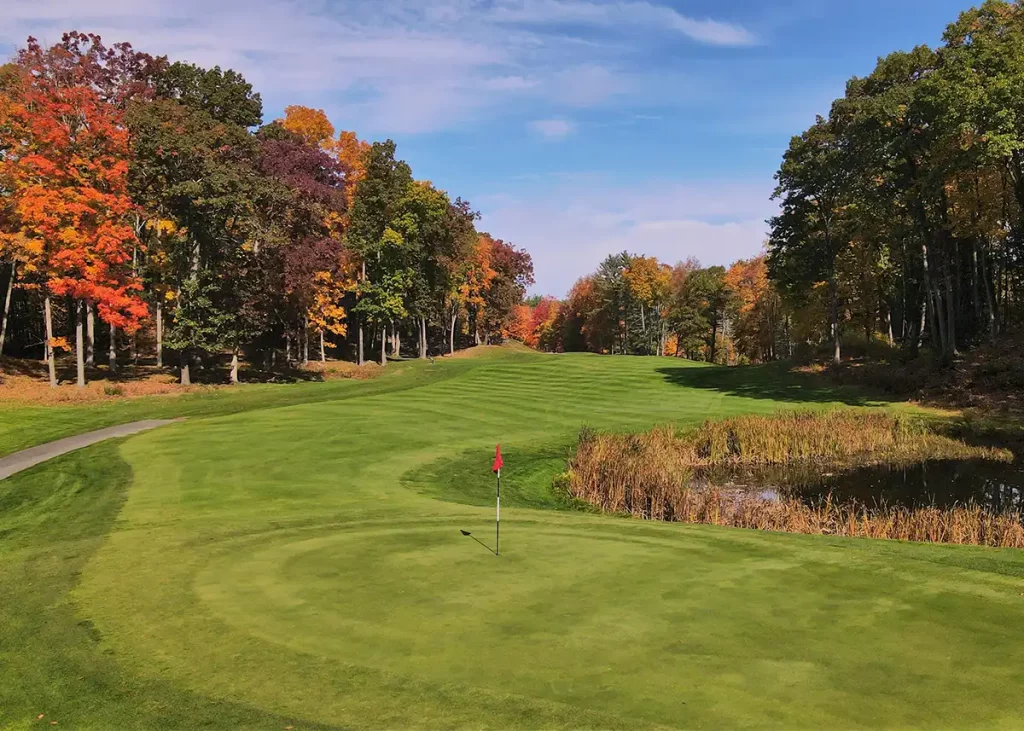
It would appear here that the green has been misplaced, since surely that thin diagonal ribbon in the distance fronted by the creek, the bank, and the bunker cannot be a viable target. A glance downward to the flat reveals that the challenge is exactly as it appears, and calls for a tee shot struck to the left center of the green. Many a short putt will be misread on this mysterious surface.
Tee | Distance |
|---|---|
Black | 204 |
Blue | 177 |
Gold | 160 |
Green | 120 |
Red | 120 |
Hole 10
Par 4 | Handicap 4
This monumentally strong and straightforward hole is a prime example of pure parkland golf, and a precursor of things to come. Despite the broad, open fairway, the tee ball should be struck to the right center and left of the kugel (mound). The golfer must then play an uphill shot to a double tiered green with bunkers left and right, and a babbling brook below. Few indeed are the players who can exceed the green and manage a par.
Tee | Distance |
|---|---|
Black | 424 |
Blue | 394 |
Gold | 368 |
Green | 333 |
Red | 333 |
Hole 11
Par 3 | Handicap 18
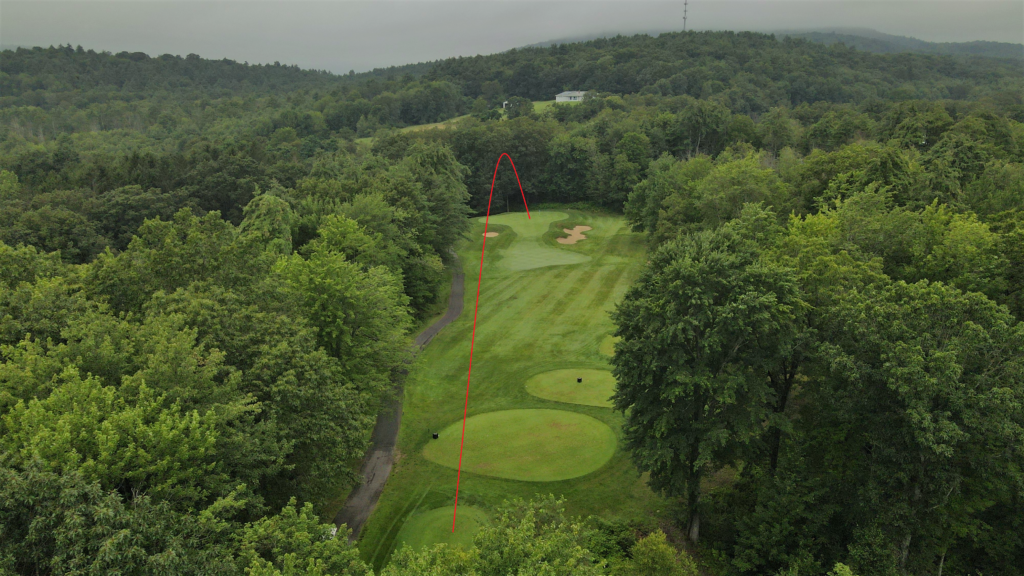
The picture of a Redan hole at North Berwick or The National comes to mind here when one views this wide, narrow par three with bunkers in front and chasm and brook below. Club selection is at a premium once again, so susceptible is the hole to the vicissitudes of wind, so shallow the surface. Another fiendish kugel is part of this putting surface, and to putt over it in either direction is to court disaster.
Tee | Distance |
|---|---|
Black | 161 |
Blue | 150 |
Gold | 131 |
Green | 92 |
Red | 92 |
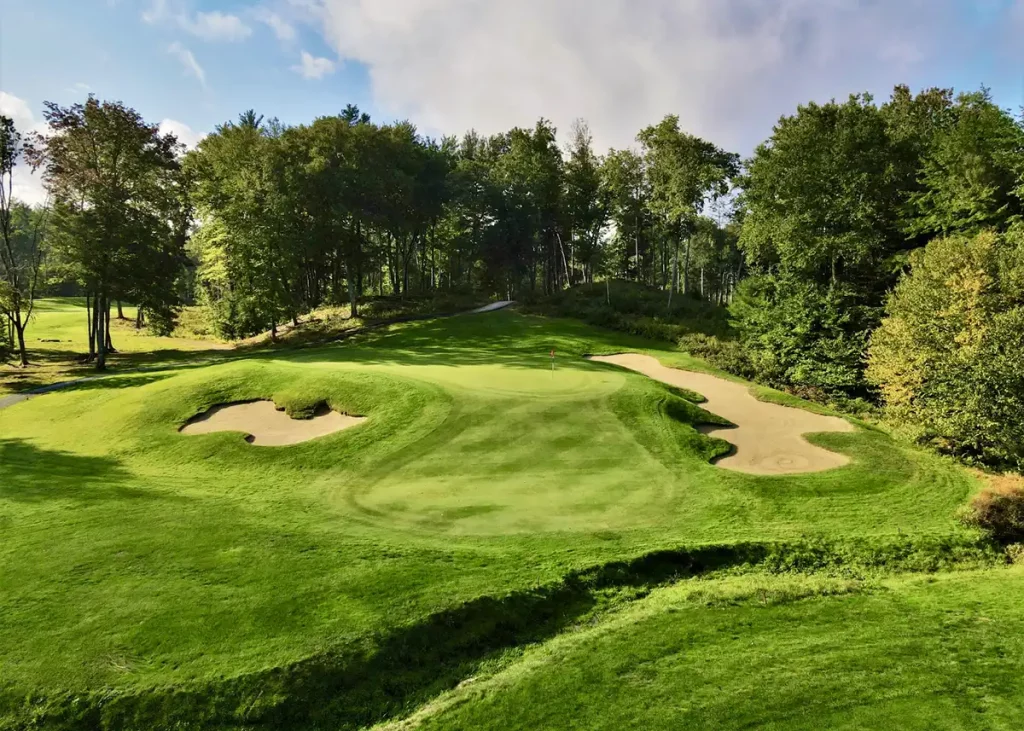
Hole 12
Par 4 | Handicap 12
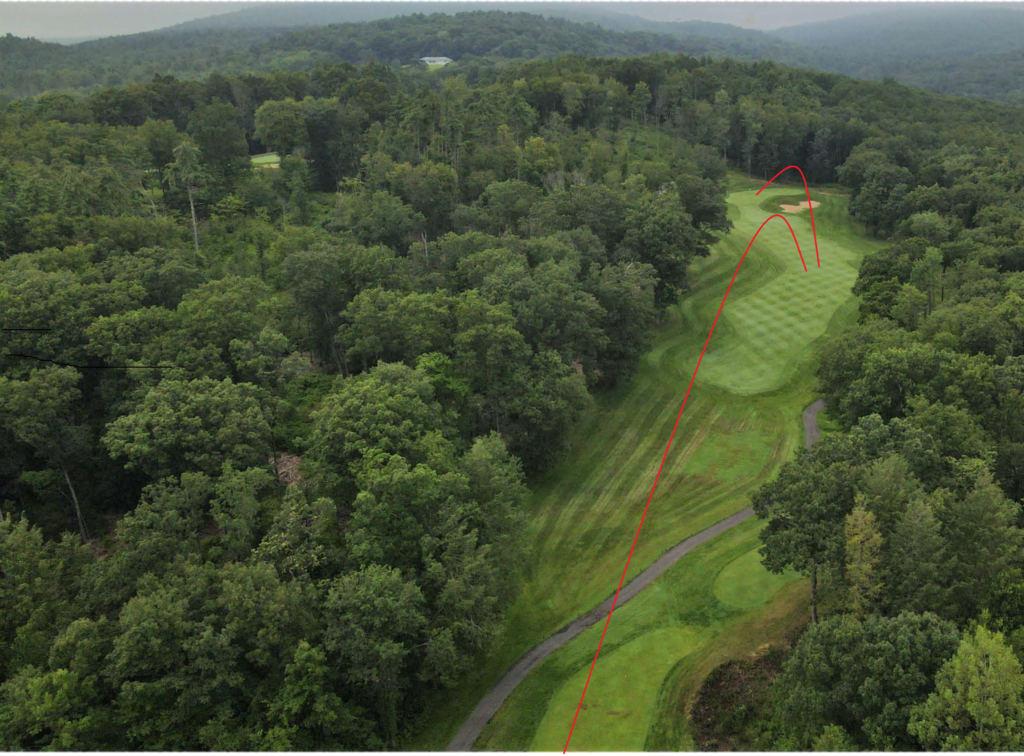
If greatness in a golf course is measured in the character of its short par fours, here truly is the soul of Crumpin- Fox. The gentle left curve of the descending fairway reveals all to the golfer at first glance, save for the penalties for those who transgress. A modest tee shot to the left of the cliff and forest leaves a short second to the green. The green is three leveled, and protected to the right with a bunker, to the back by a creek and forest, to the left by a pond and an imposing hickory tree. A judicious second shot will find the center of the green, but the final examination is in the putt.
Tee | Distance |
|---|---|
Black | 388 |
Blue | 374 |
Gold | 359 |
Green | 329 |
Red | 329 |

Hole 13
Par 4 | Handicap 10
Towering pines line the fairway of this straight-away par four. From the elevated tee the first shot is struck towards the right center, just left of yet another fairway kugel. The kidney shaped green is protected right and rear by bunkers, and slopes subtly toward a pond in front. The wise golfer will make his mistake to the right as an errant shot may bound off the hillside and onto the putting surface.
Tee | Distance |
|---|---|
Black | 393 |
Blue | 370 |
Gold | 346 |
Green | 308 |
Red | 308 |
Hole 14
Par 5 | Handicap 14
No less and authority than the late Bobby Jones regarded the short par fives as the linchpin of a golf course, and one wishes that he could view number fourteen. Modest in length and with a large bunker left in the landing area and a brook right, it nonetheless requires a strong tee shot to make reaching the green in two a possibility. The prudent player lands his second shot short of the pond which fronts the green, the audacious player plays at the green or to the small landing area to the right of the pond. Several levels of putting surface are clearly in evidence, and a pin placement to the left rear of the green brings both the pond and a broad rear bunker into play.
Tee | Distance |
|---|---|
Black | 527 |
Blue | 506 |
Gold | 487 |
Green | 454 |
Red | 454 |
Hole 15
Par 3 | Handicap 16
One must reach the putting surface of this mid- length par three after traversing the pond and cope with deep bunkers left, a steep hillside to the rear or a wooded bank right. There is no relief. The difficulty of this hole is compounded by a multi- leveled putting surface, of which the lower level is exceedingly fast. Many a players contemplating the impending disasters of the last three holes have come a cropper on number fifteen first, dashing their hopes but assuring their return to Crumpin- Fox.
Tee | Distance |
|---|---|
Black | 175 |
Blue | 172 |
Gold | 138 |
Green | 108 |
Red | 108 |
Hole 16
Par 4 | Handicap 2
Only a prodigious striker of the ball can anticipate a reasonable shot into this immense par four. The tee ball must be played down the left side of the fairway to afford a clear view of the hole as it bends uphill to the right toward and elevated green. Bunkers and woods left and right insure that the green itself remains inviolate to all but the purest shot. Yet another facet of this hole is the deceptive speed with which a putt rolls from the back to the front. A well played par here may save an otherwise lackluster round in the eyes of the golfer.
Tee | Distance |
|---|---|
Black | 457 |
Blue | 410 |
Gold | 376 |
Green | 351 |
Red | 351 |
Hole 17
Par 5 | Handicap 6
The intricacies of this long, meandering test of golf are not readily evident from the tee. The strong player must play his tee ball as closely as possible to the ominous pine tree on the right of the fairway to have any hope of reaching the green in two. The prudent player assays a tee shot down the center of the fairway, and places his second to the right of the hickory- bearing hump in the center of the fairway. From here an open yet testy short iron must carry one of four cavernous bunkers guarding the right side of the green. To attempt the second shot left of the hickory is risky. However, the reward is a relatively easy pitch to the green which is both long and narrow.
Tee | Distance |
|---|---|
Black | 565 |
Blue | 508 |
Gold | 491 |
Green | 468 |
Red | 468 |
Hole 18
Par 4 | Handicap 8
Surely one of the most draconian finishing holes ever encountered, and a hole worthy of Darwin’s ennoblement. The tree lined tee box faces secretly left to “The Office”- a collection area of golf balls, rocks, trees and broken dreams. The proper tee shot is played down the right center with perhaps a slight fade. From the fairway one spies the green perched upon a hummock, guarded in front by a deep bunker and a pond. The green takes the shape of an inverted teardrop, and never allows much of its surface to be exposed to even the most astutely played shot. Few are the matches won at the expense of this magnificent gem, rather are they lost. A true test of nerve and skill, and a fitting climax to a superb course indeed.
Tee | Distance |
|---|---|
Black | 413 |
Blue | 389 |
Gold | 378 |
Green | 306 |
Red | 306 |